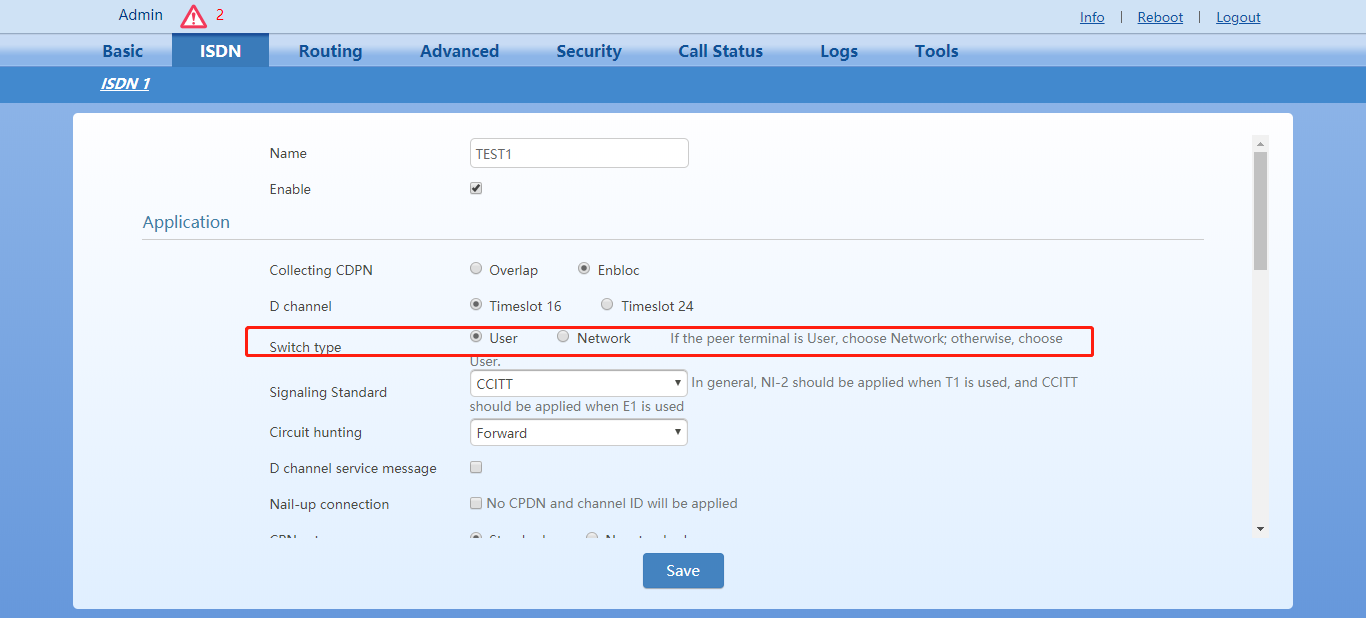
The 3CX system can be successfully integrated with the Voptech E1 gateway, and the 3CX system can make inbound and outbound calls from the Voptech E1gateway.For the installation of the VoptechE1 gateway and the connection to the E1 line, please refer to the installation manual of the VoptechE1 gateway.
Prerequisites:
1.3CX has been installed and deployed, and the network is smooth.
2.After the Voptech E1 gateway is installed, it is connected to the E1 network and the data is ready.
Next is the 3CX integrated with the Voptech E1 gateway.
step 1
Configuring the Voptech E1 Gateway
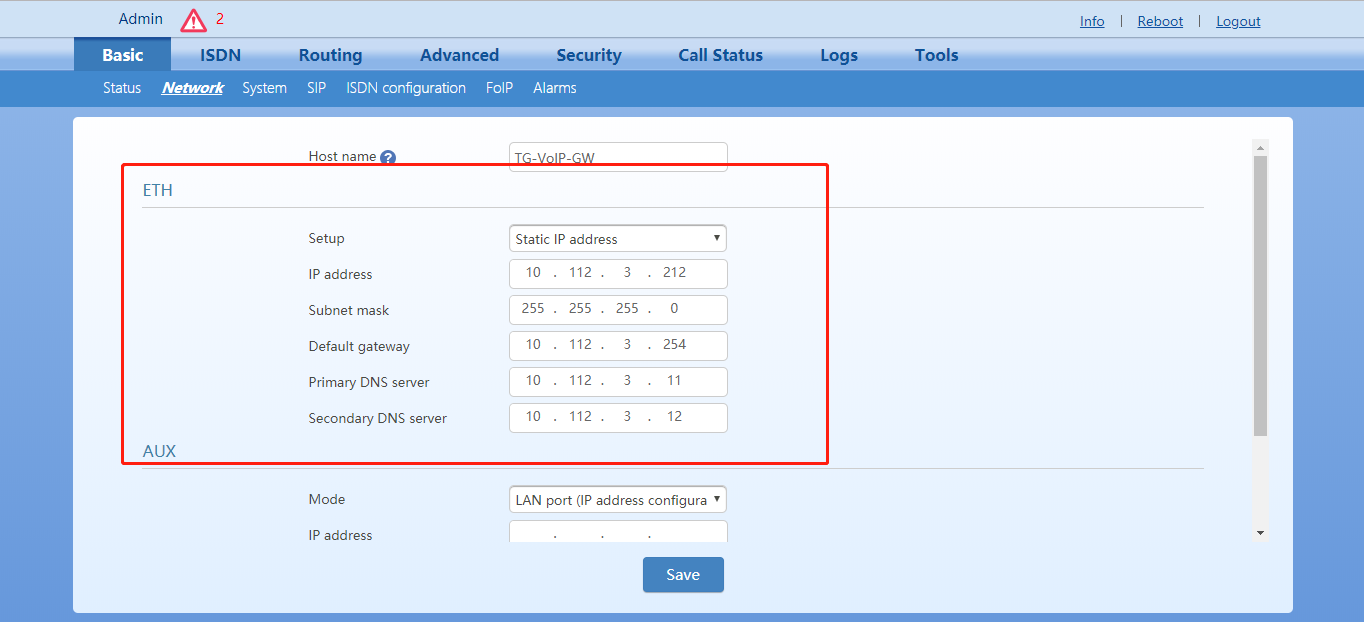
1.Modify the IP address of the Voptech E1. Enter the intranet IP address, subnet mask, and default gateway provided by the customer.
2.configure the routing table
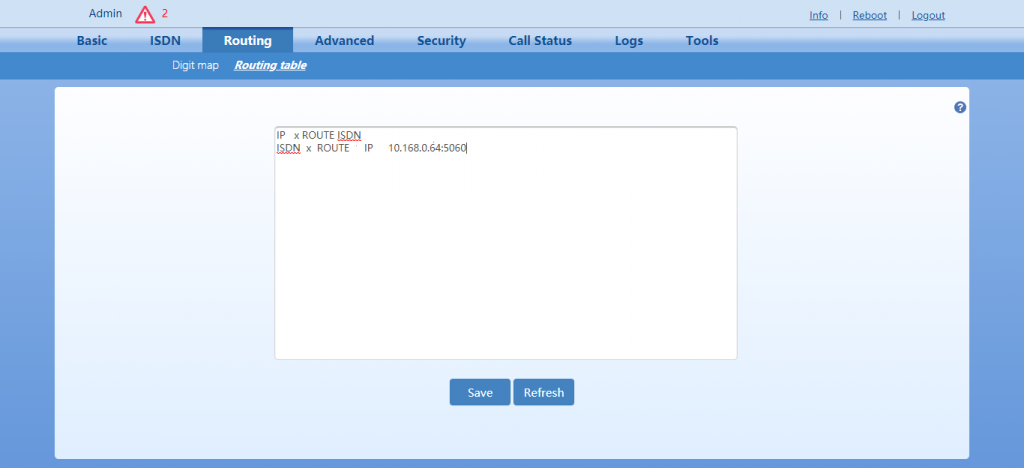
IP X ROUTE ISDN
This means that when the VoptechE1 gateway receives any call from any IP, the call will be sent out from the ISDN port.
ISDN X ROUTE IP 10.168.0.64:5060
This means that calls coming in from any ISDN port are sent to the IP: 10.168.0.64 server.
The integration of the VoptechE1 gateway is basically complete.
Step 2
Set up 3CX SIP trunk
1.Create a sip trunk belonging to the VoptechE1 gateway in 3CX, select “Add SIP Trunk”, and related settings.

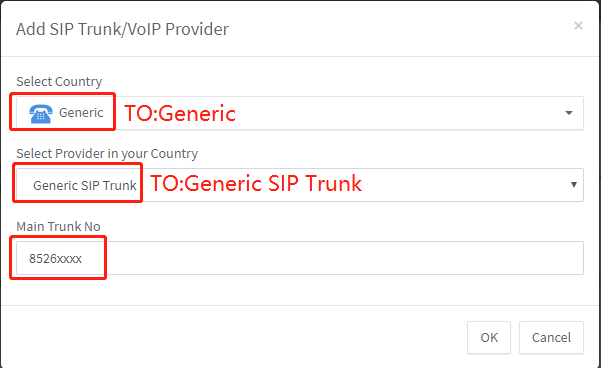
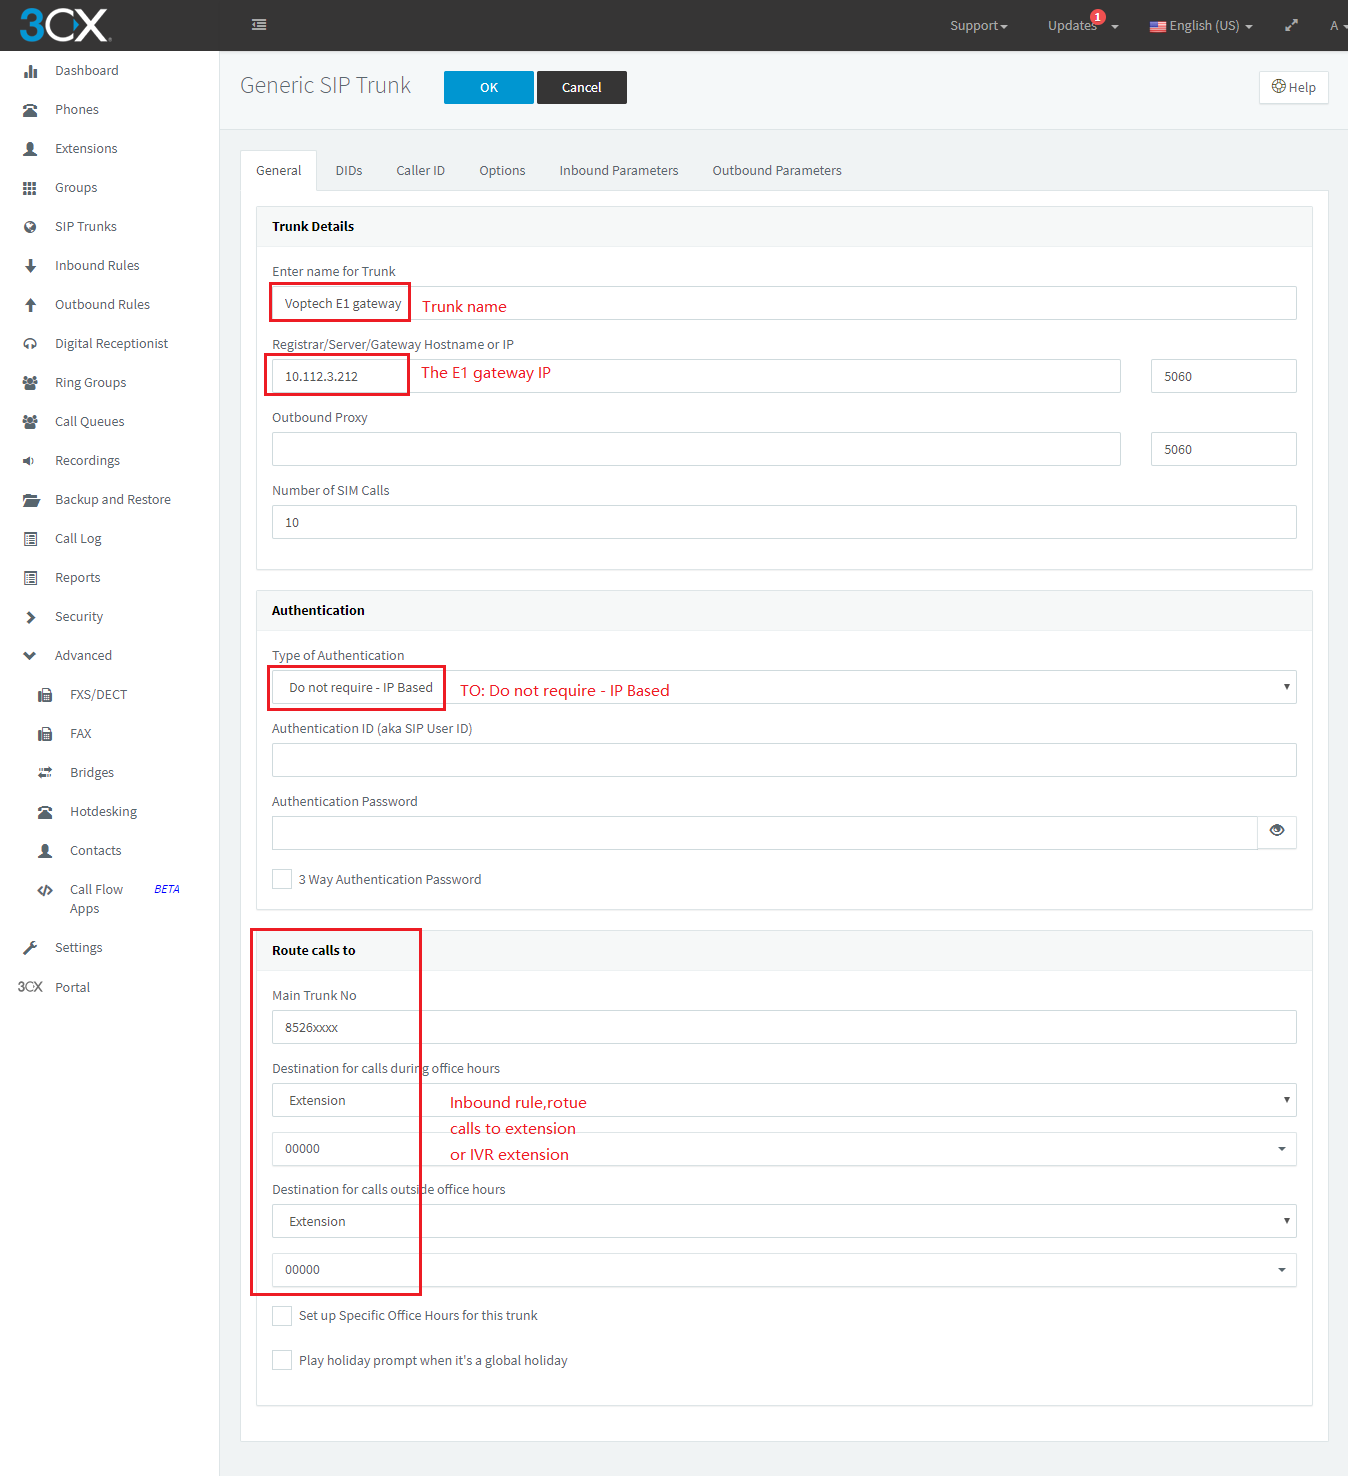
When the setup is complete, click Save.
1.Set the outgoing call rule on the 3CX. For example, we set the number prefixed with 9 to exit the VoptechE1 gateway.

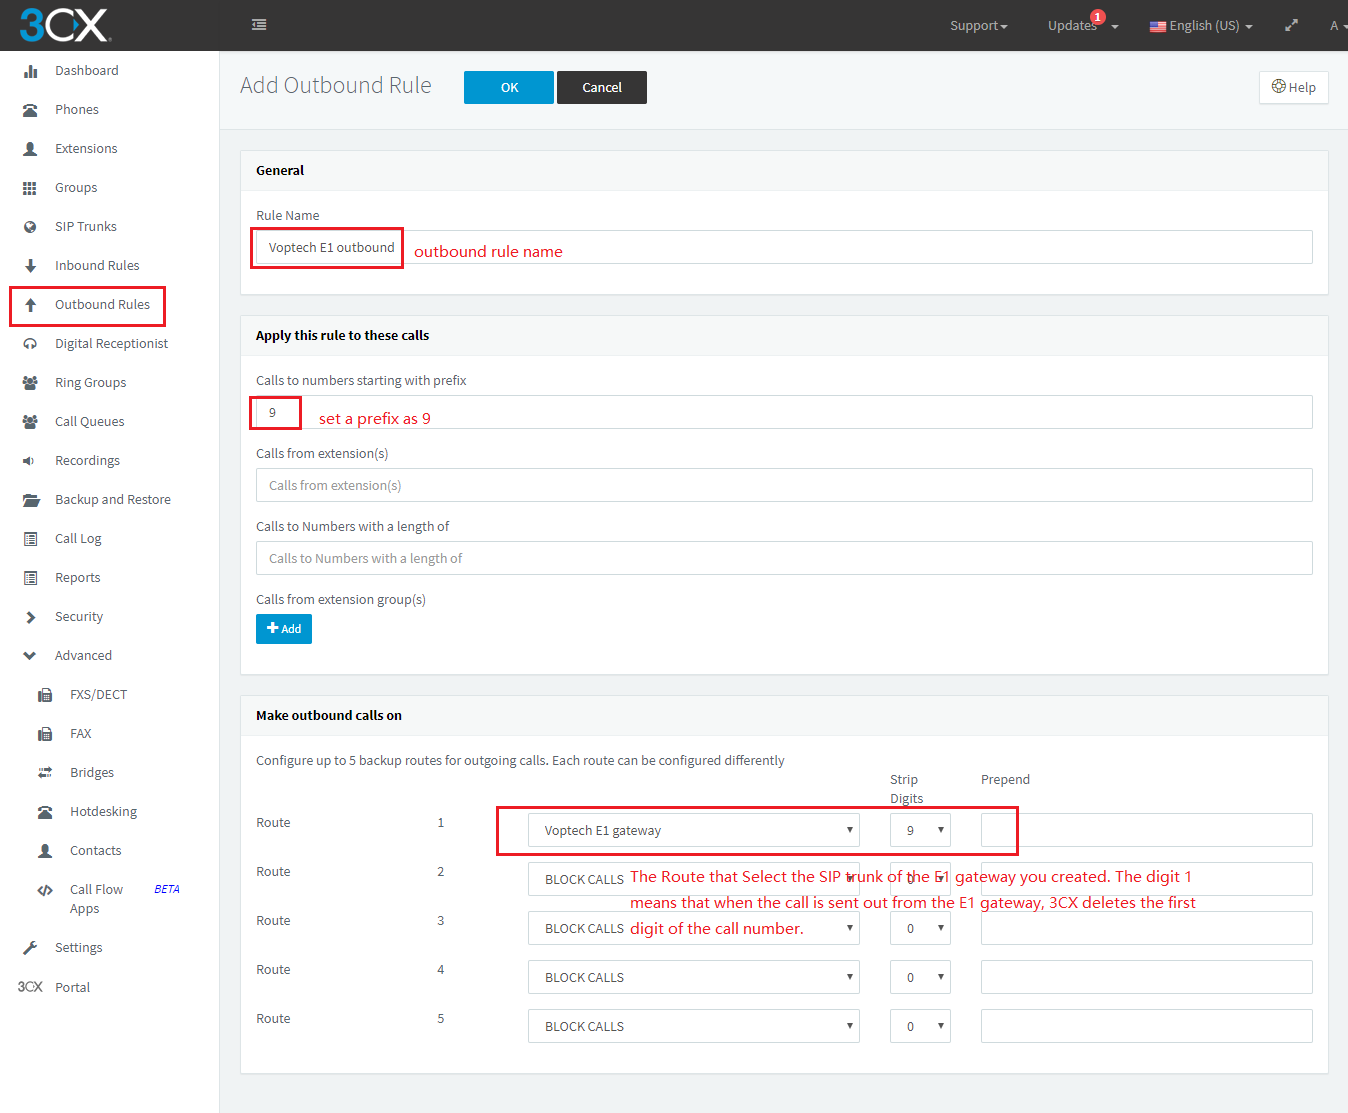
This way the setup between the 3CX and the Voptech E1 gateway is basically complete. The next step is to perform an incoming and outgoing call test, and make relevant adjustments based on the incoming and outgoing call test.
Tips:
1.Voptech E1 gateway checks whether the physical layer is connected.
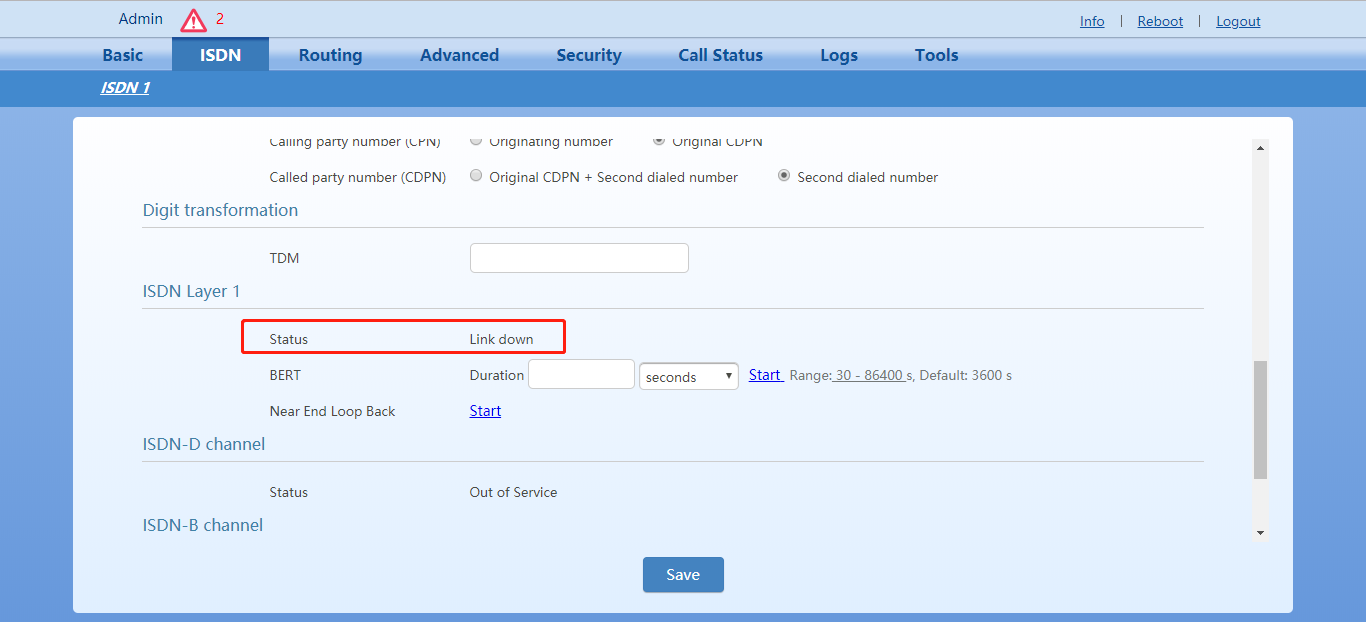
2.The Voptech E1 gateway checks whether the link layer is connected. State=OOS indicates that the link layer is unreachable; State=IS indicates that the link layer is connected.

If it is State=OOS, adjust the switch type: user side or network side; or check whether the line order is correct.
